Home Blog Website Development Hosting Your Site On The AWS Cloud Server – A Tutorial
Hosting Your Site On The AWS Cloud Server – A Tutorial
- 07 Sep / 2018
- 26,604 views
“I don’t need a hard disk in my computer if I can get to the server faster… carrying around these non-connected computers is Byzantine by comparison.” – Steve Jobs.
What had been the science fiction of yesterday has become the reality of today. This statement truly encapsulates how interconnected computers have revolutionized our lives. The advent of cloud computing has ushered in a form of democracy in the highly competitive global digital landscape. In fact, it has created a level playing field for the small and medium sized companies to host their sites, databases, analytics, networking, mobility, and applications on secured cloud platforms like the AWS. By doing so, they derive a slew of benefits such as cost optimization (pay as per usage,) flexibility (customized solutions provisioning the server when needed,) scalability, security, and speed.
Among the various cloud hosting services, Amazon Web Services (AWS) have become the undisputed leader with an active subscriber base of 1 million in over 190 countries (Source: https://expandedramblings.com/index.php/amazon-web-services-statistics-facts/.) Furthermore, AWS hosts the who’s who of global business such as Reddit, Netflix, Nokia, Discovery, Lamborguini, Dow Jones, Unilever, Pfizer, Vodafone, and many others (Source: Reddit.com.) The above stats firmly establishes AWS as a secure and cost effective hosting solution. So, should you want to join the above list of companies and host your site on AWS, then the blog can act as a ready reckoner. It lists the process (along with relevant screenshots) to host your website on the AWS cloud server in the form of a tutorial. However, before getting into the brasstacks, it is better to understand a few terminologies.
Glossary of terms
Amazon EC2: The Amazon Elastic Compute Cloud is a web service that helps you to run virtual machines in the cloud by configuring its capacity, security, and networking.
EC2 instance: A virtual server on Amazon’s Elastic Compute Cloud (EC2) to run your business software.
Key pair: The EC2 platform uses a public key cryptography algorithm to encrypt and decrypt the login info. According to this, the public key encrypts a piece of data (read a password) while the recipient uses a private key to decrypt the same. The combination of public and private keys are called a key pair.
SSH: Known as Secure Shell, SSH is a network protocol to operate secured network services in a client-server architecture. The examples are accessing the shell accounts on multi operating systems like Unix.
Puttygen software: As a key generator and a free and open source network file transfer application, it generates key pairs related to public and private keys.
The Tutorial on AWS Cloud Server
Step 1: Visit the URL https://aws.amazon.com/ and fill the sign in details as shown below.
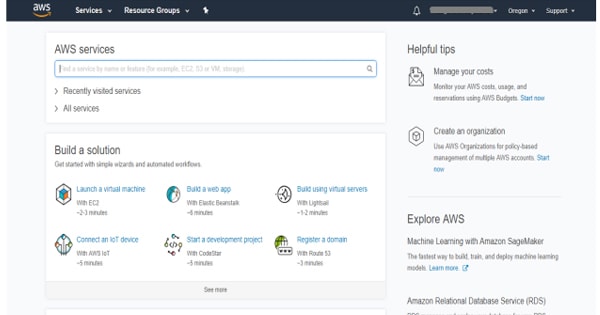
After logging into the AWS account, the main dashboard appears as below. Notice the main fields being preceded by ‘0’.
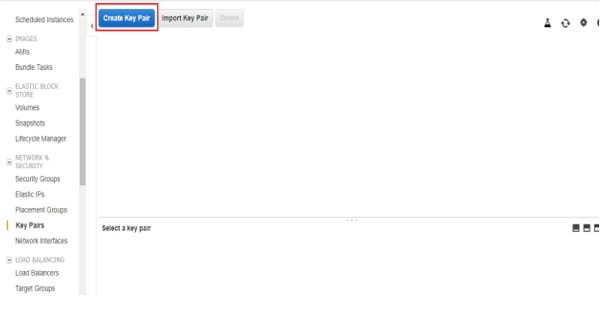
Step 2: Before we create the EC2, we need to create a key pair to associate with EC2. The key pair helps to connect the EC2 through SSH.
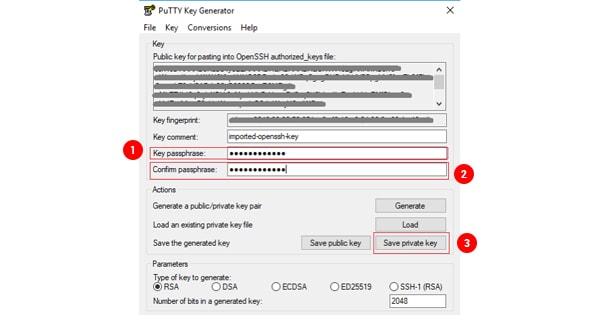
Step 3: After the key pair is created, a one time .PEM file gets generated and downloaded. Now, we need to generate a .PPK file from the .PEM file by using the Puttygen software. During this time, we have to enter a passphase as well. Later, we need to use this PPK file to connect the EC2 through SSH.
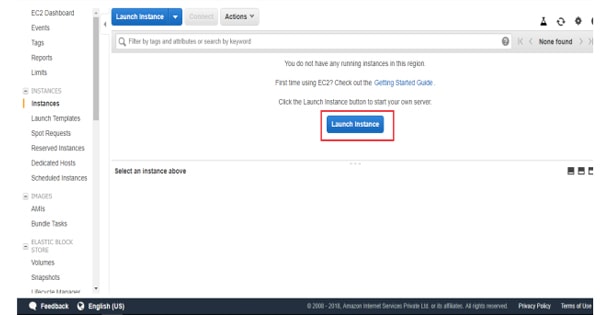
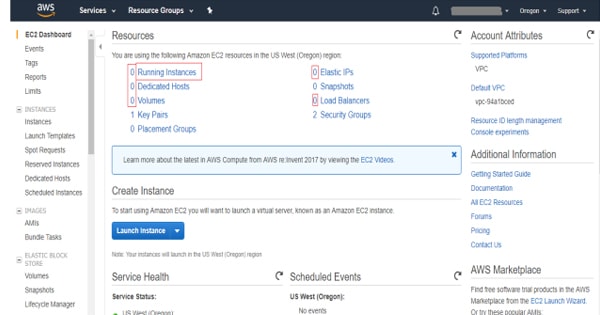
Step 4: Now we are about to create an EC2 Instance.
Step 5: Click on the Launch Instance to start configuring your own EC2.
Step 6: Select an operating system for your EC2. For this tutorial, we have used Ubuntu Server 16.04 LTS (HVM), SSD Volume Type- ami-51537029, which is open source and free.
Step 7: Next, we have to select our EC2 type (CPU, Memory/RAM etc.) For this tutorial, we have used the t2micro, which comes with a free tier eligibility for one year.
Step 8: Now we have to select the number of instance / Machine and leave the remaining things as they are.
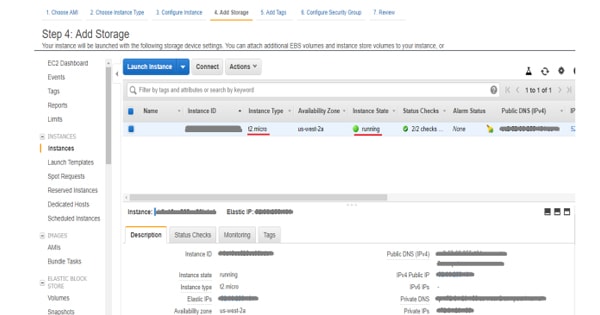
Step 9: After clicking on the Review and launch buttons, a review page will appear. Click on the Launch button in the review page and see your EC2 being generated. It will take a few minutes to get running.
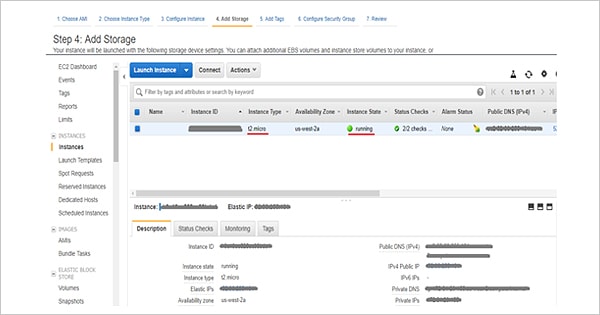
Step 10: It is time to give permission to the firewall by using the security group.
- Add SSH in the inbound and outbound sections and allow 22 (File Transfer Port)
- HTTP 80 (Browser port)
Now, once our EC2 is in running status, we can connect it through the Puttygen software.
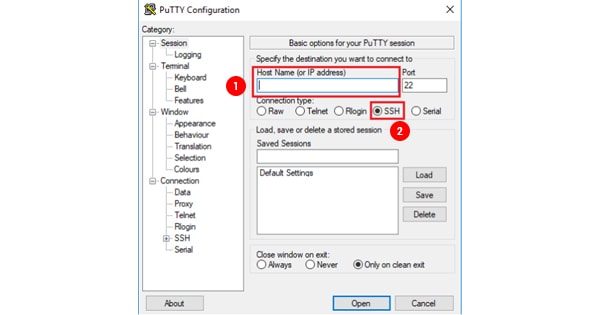
Step 11: Please enter your Public IP as the host name. You will get this Public IP from your EC2 page. Also, select the SSH option.
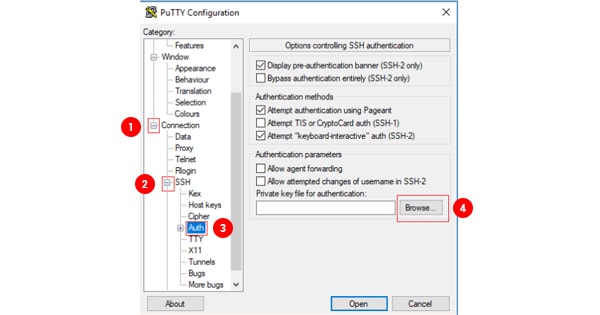
Step 12: Click the browse button to select the PPK file that we have generated from the PEM file of key pair and click open. This will open the Puttygen software.
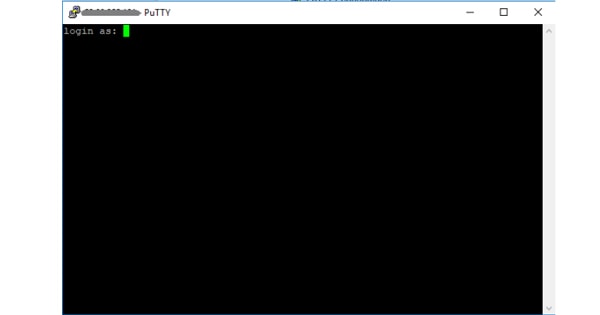
Step 13: Here, you will be prompted for the login user name and password. Note the default username is ‘ubuntu’ for the Ubuntu Server 16.04 LTS used in this tutorial. The password is the passphase that you had set at the time of creating the PPK file.
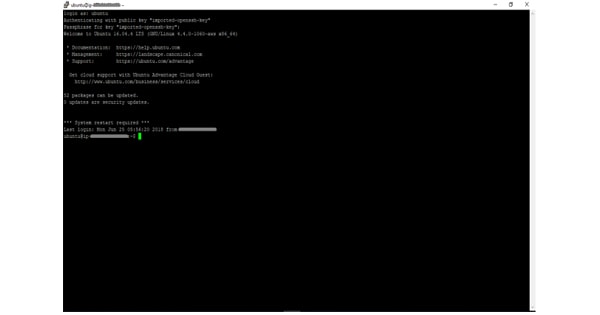
Step 14: Once you have logged in successfully, you can proceed to install dependencies such as Apache, MySql, PHP and others as described below.
To set up an Apache Server Engine, type the following
$ sudo apt-get update
$ sudo apt-get install apache2
To set up MySql database, type the following
$ sudo apt-get install mysql-server
To set up PHP language and other dependencies, type the following
$ sudo apt-get install php libapache2-mod-php php-mcrypt php-mysql
To get PHP and MySQL working, we need to restart the Apache server
$ sudo systemctl restart apache2
Now, if you enter your public IP (from EC2) on the browser, the following screen will appear.
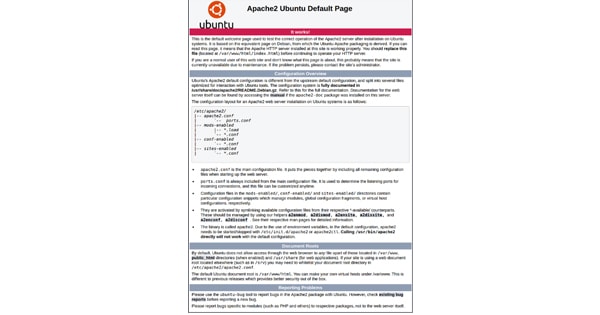
If you are not getting this screen, then check the previous steps once more.
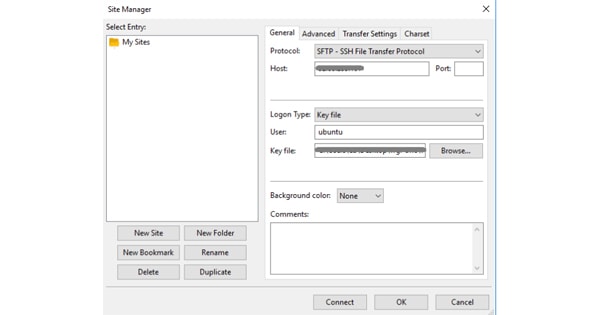
As of now, your server configuration is complete. Now, let us connect your server with the file transferring tool – FileZilla in our case.
Step 15:
- Enter your public IP in the host section.
- Select SFTP as the protocol.
- For login, type the default key file as ‘ubuntu’ and browse the PPK file.
- Hit connect and when prompted for a password, type the passphase that you had entered at the time of creating the PPK file.
Once the connection is established, the screen ‘/home/ubuntu’ will appear, which you have to redirect at ‘/var/www/html’. This folder is created with Apache and PHP installation. This will be your site’s web root, where you will upload all your files. Upload a demo html/php file and check it in your browser with ‘http://your_public_IP/demo.php‘.
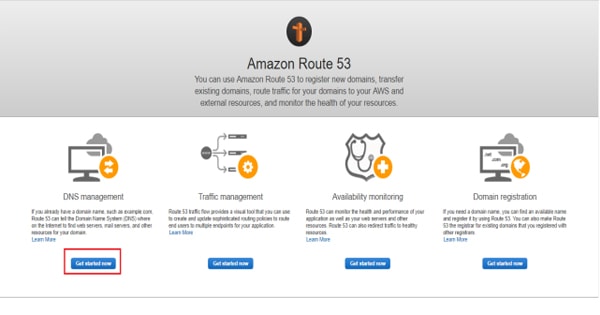
Step 16: Once the site is up and running, the next step is domain pointing through the Route53 option. You can get this option under the service menu -> Networking & Content Delivery -> Route53.
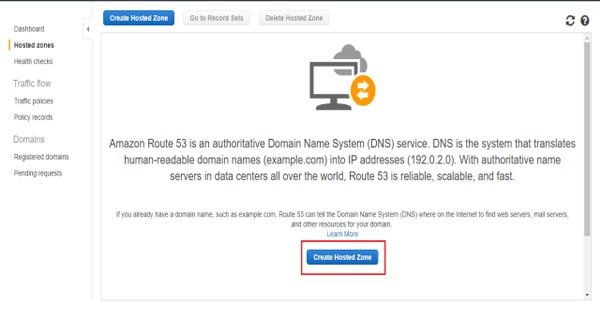
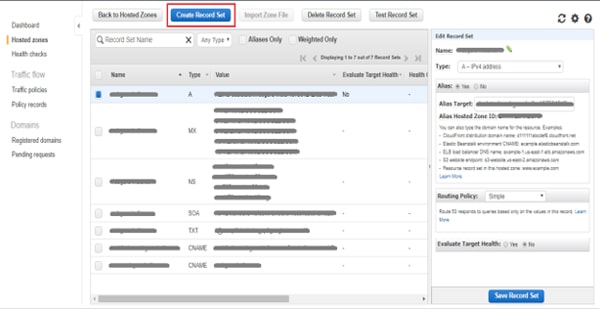
Step 17: Here you have to set the following:
- A record (EC2 connection),
- An MX record (mail server connection),
- NS record and SOA will be generated automatically,
- CNAME to make an alias with www and without www.
Step 18: Now, log in with your domain provider and go to the Name Server (NS) management page. Here, you have to enter the NS records from AWS Route53. Once this process is completed, you have to wait for some time to fully propagate the domain to AWS. The time may vary depending on your domain provider. For example, at an average, the maximum time can be of 24 hours.
Once your domain is fully propagated, you can enter the same into the browser.
Related Article: Different Types of Web Hosting and How They Work
Conclusion
By hosting your site on the EC2 Amazon Web Service server (AWS), you join the ever growing list of enterprises and derive a multitude of benefits at virtually no extra cost. This exercise will keep your enterprise in good stead and help it compete against the established players. So, should you want to design, develop and host your site on the AWS cloud server at cost effective rates, contact a professional and experienced website development company.

2 comments
Leave a Reply

-
1000+
Happy
Clients -
25+
Countries
Served -
20+
Years of
Trust
I need help with...


Very Nice Blog for This Generation . Thank You.
Great post, I really loved it. Keep posting. Thanks for sharing.